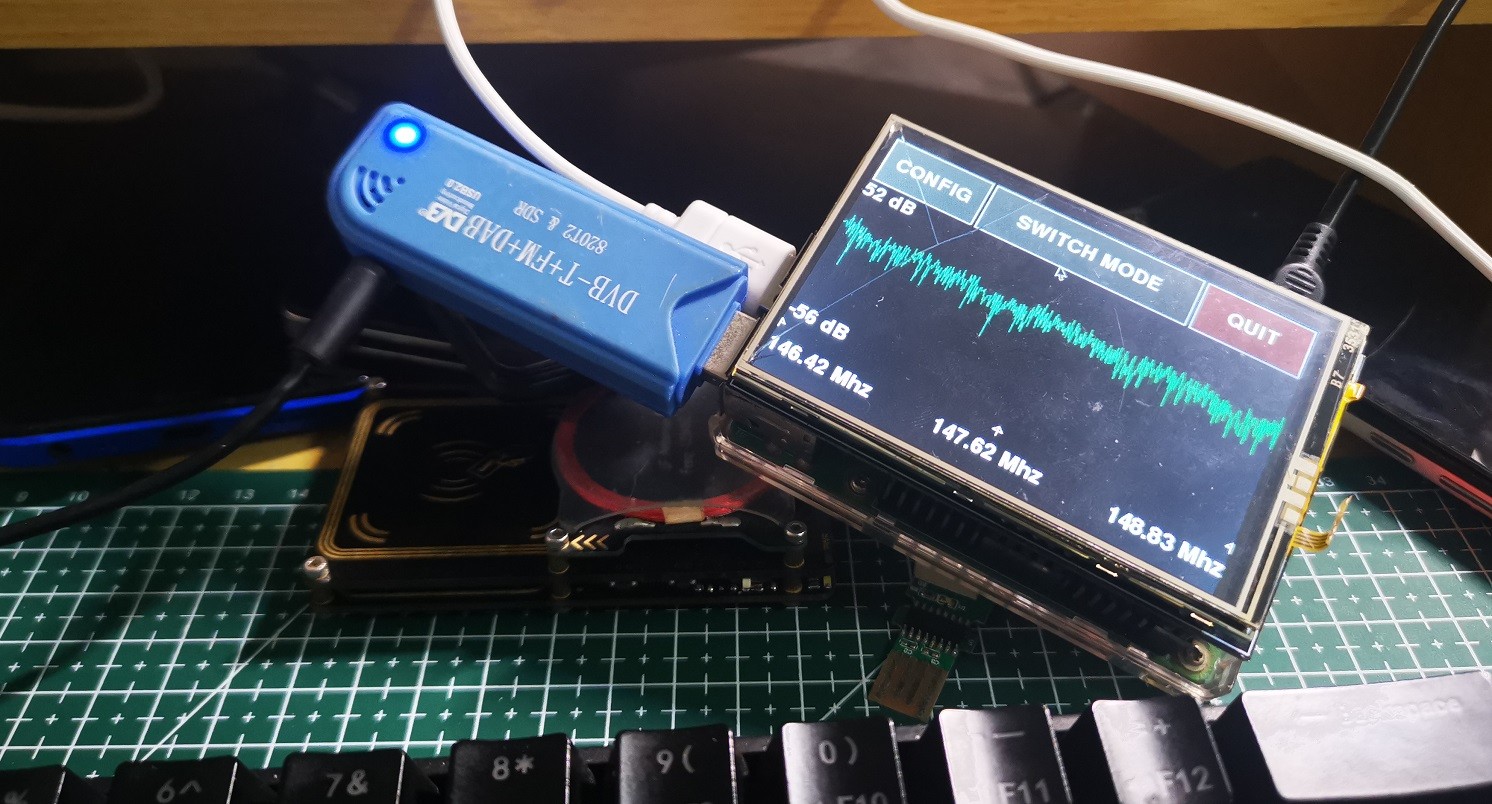
Here’s the finished product first
What you’ll need
- A Raspberry Pi
- A 3.5-inch display
- An SDR receiver
- Your brilliant brain
If you need a 3.5-inch screen mirror, contact me. Flashing the official website image directly will result in a weird resolution (probably).

Let’s get started
After flashing, remember to enable SSH to your network (recommended: systemctl enable ssh), which makes operations easier.
Then remember to update your software sources. We recommend using the official source, but using a Chinese Raspberry Pi source is also acceptable.
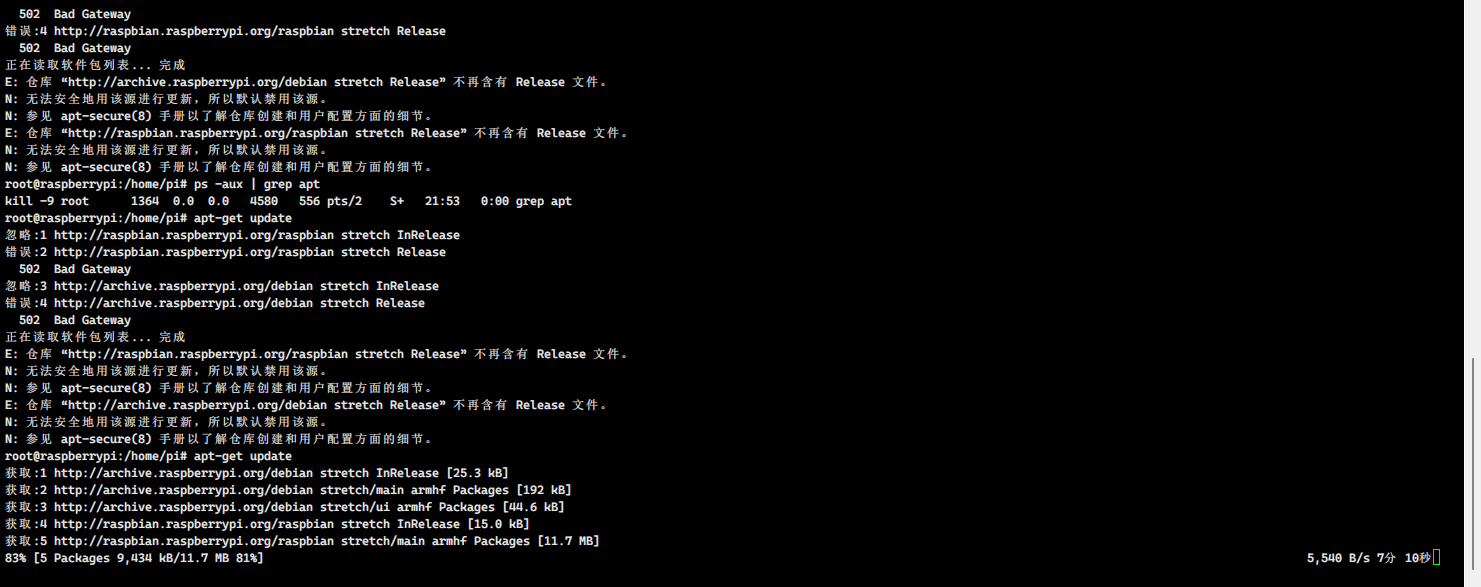
Here’s the official source to avoid getting lost.
1 | deb http://raspbian.raspberrypi.org/raspbian/ stretch main contrib non-free rpi |
First, install the dependencies.
1 | sudo apt-get update sudo apt-get install git cmake build-essential python3-pip libusb-1.0-0-dev libsdl2-2.0-0 libatlas-base-dev librtlsdr0 |
Then install some Python modules.
1 | sudo pip3 install numpy pygame -i https://pypi.tuna.tsinghua.edu.cn/simple some-package |
Go to the repository https://github.com/adafruit/FreqShow and clone it to your Raspberry Pi.
1 | cd ~ |
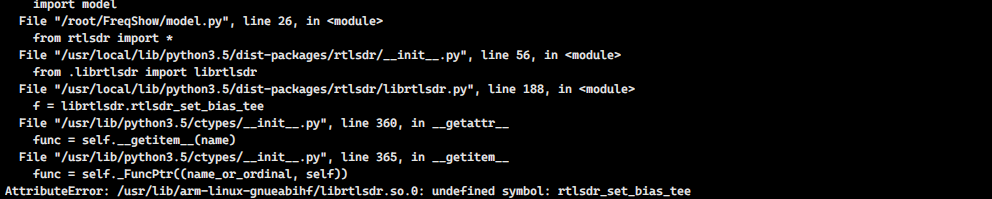
Note the installation of rtlsdr Otherwise, you’ll get some strange errors.
1 | apt-get install libusb-1.0-0-dev git cmake |
Here’s a tip from the author:
If using the official 7” Raspberry Pi Touchscreen instead of a PiTFT, edit the file freqshow.py and comment out the following lines as shown (starting around line 73). Do NOT do this if using a PiTFT!
1 | #os.putenv('SDL_VIDEODRIVER', 'fbcon') |
In essence, if you’re not using the PiTFT as your display, you need to delete the above lines of code in freqshow.py.
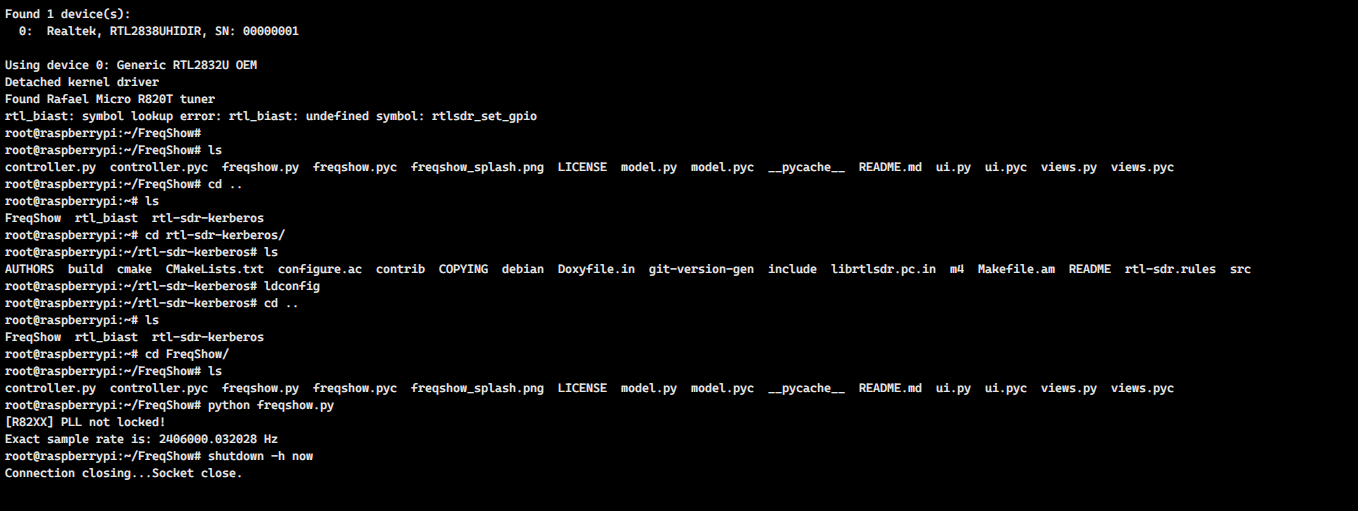
Once everything is ready, simply run python freqshow.py That’s it
Demonstration video
References
- (Freq Show: Raspberry Pi RTL-SDR
Scanner) [https://cdn-learn.adafruit.com/downloads/pdf/freq-show-raspberry-pi-rtl-sdr-scanner.pdf] - (Rtl-sdr - rtl-sdr - Open Source Mobile Communications) [https://osmocom.org/projects/rtl-sdr/wiki/Rtl-sdr]


