
Solana 开发笔记
学习完以太坊基础知识和比特币白皮书后接着来学习 Solana,官方文档 https://solana.com/zh/docs?locale=docs
关于 Solana 采用的加密算法,在 Solana 中,采用了了 Ed25519 curve 非对称加密算法,用于生成数字签名和验证数字签名。与对称加密算法不同,非对称加密使用一对密钥:pubkey公钥和secretkey私钥,如果使用公钥加密,则只有对应的私钥能够进行解密;如果使用私钥加密,则可以使用对应的公钥验证签名,即判断该签名是否由私钥的持有者发起。
Solana 使用 Rust 语言进行开发,如果您之前没接触过 Rust 建议花点时间看看相关资料,以下是我整理的一些 Rust 教程:
Introduction
Solana 的高性能网络是它的一个亮点。为了实现高吞吐量,Solana 采用了许多独特的技术,其中最为关键的是它的时间戳技术——Proof of History(PoH)。PoH 是 Solana 的一个创新,它通过将时间序列作为区块链的一部分,允许节点在没有全网同步的情况下验证交易的顺序,从而大大提升了系统的处理效率,Solana 的区块链与其他区块链不同,它采用了”单链架构”,这一点有别于以太坊和比特币的多链架构。Solana 的设计允许它在每个区块内处理大量的交易,不需要进行链间的通信或者合并,这使得 Solana 可以达到每秒数万笔交易的吞吐量,Solana 还支持智能合约和去中心化应用(DApps),但与以太坊相比,Solana 的智能合约运行更加高效且低成本。Solana 的智能合约使用 Rust 或者 C 语言编写,而不是以太坊上的 Solidity 语言,这给开发者带来了一些新的挑战,但也提供了更大的灵活性和更强的性能。
Solana 白皮书:https://solana.com/solana-whitepaper.pdf
关于 Solana 的网络
Solana的网络环境分成开发网、测试网、主网三类,开发网为Solana节点开发使用,更新频繁,测试网主要 给到DApp开发者使用,相对稳定
- DevNet: https://api.devnet.solana.com
- TestNet: https://api.testnet.solana.com
- MainNet: https://api.mainnet-beta.solana.com
Develop Environment
首先安装 Rust 环境
1 | curl --proto '=https' --tlsv1.2 -sSf https://sh.rustup.rs | sh -s -- -y |
接着下载 Solana 的 CLI
1 | sh -c "$(curl -sSfL https://release.anza.xyz/stable/install)" |
如果下载完成,会提示让你配置环境变量,简单配置下就好了
1 | ❯ sh -c "$(curl -sSfL https://release.anza.xyz/stable/install)" |
接着输入 solana --version 查看版本
这里列举几条常用的命令
- 配置网络
1 | solana config set --url https://api.mainnet-beta.solana.com # 主网 |
- 创建钱包
1 | ❯ solana-keygen new --outfile ~/icecliffs_test.json # 保管好 |
这里创建好的助记词对应 BIP39 里
https://github.com/bitcoin/bips/blob/master/bip-0039.mediawiki
- 查看账户信息,第一次创建可以到这里领水 https://faucet.solana.com/
1 | ❯ solana-keygen pubkey # 看看你的 |
这里连接 Github 可以领到很多的 Solana
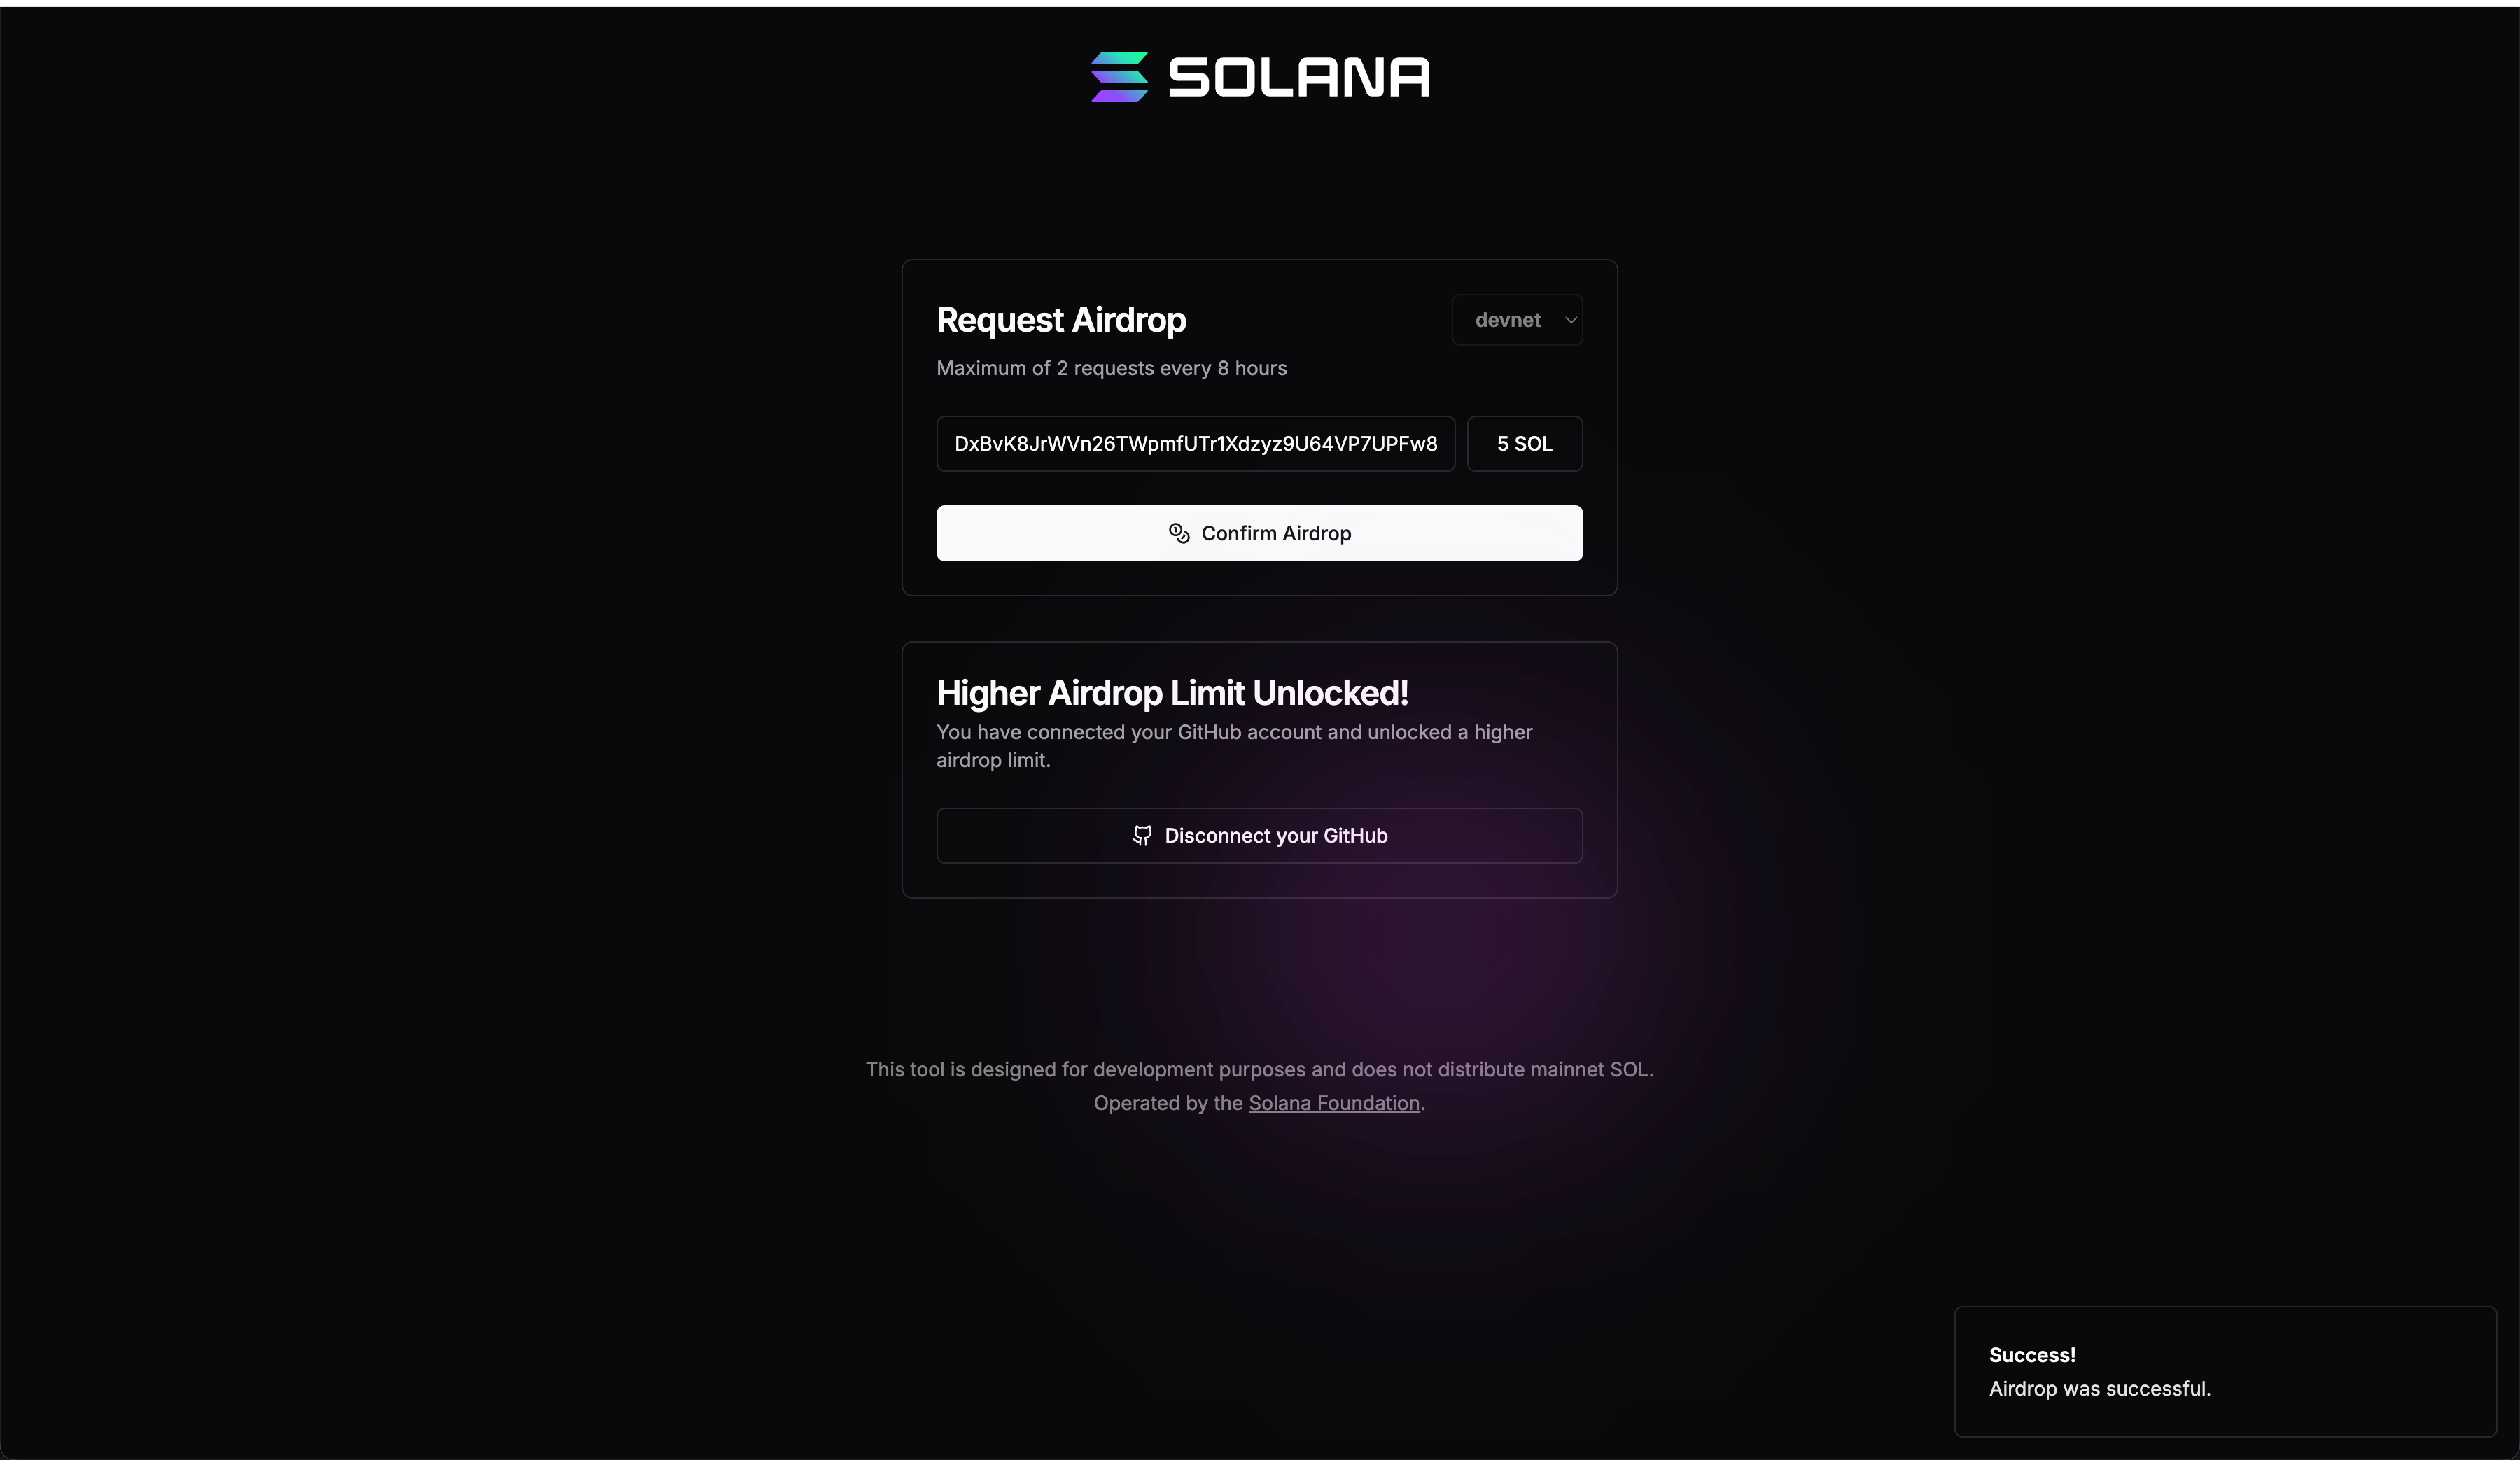
如果是真金白银就好了()

也可以通过下面这条命令来获取
1 | solana airdrop |
- 转账
1 | solana transfer <destination-public-key> <amount> --from ~/my-wallet.json |
- 创建代币账户(创建一个新的代币账户(用于接收和持有 SPL Token))
1 | solana spl-token create-account <mint-address> |
- 获取区块链的最新区块信息
1 | solana block |
- 部署智能合约
1 | solana program deploy <path-to-your-program> |
- 更新 Solana
1 | solana update |
需求一:假设我们现在有一个需求,拥有两个钱包,想要转来转去,可以用下面这条命令
1 | ❯ solana config set --keypair ~/icecliffs_a.json |
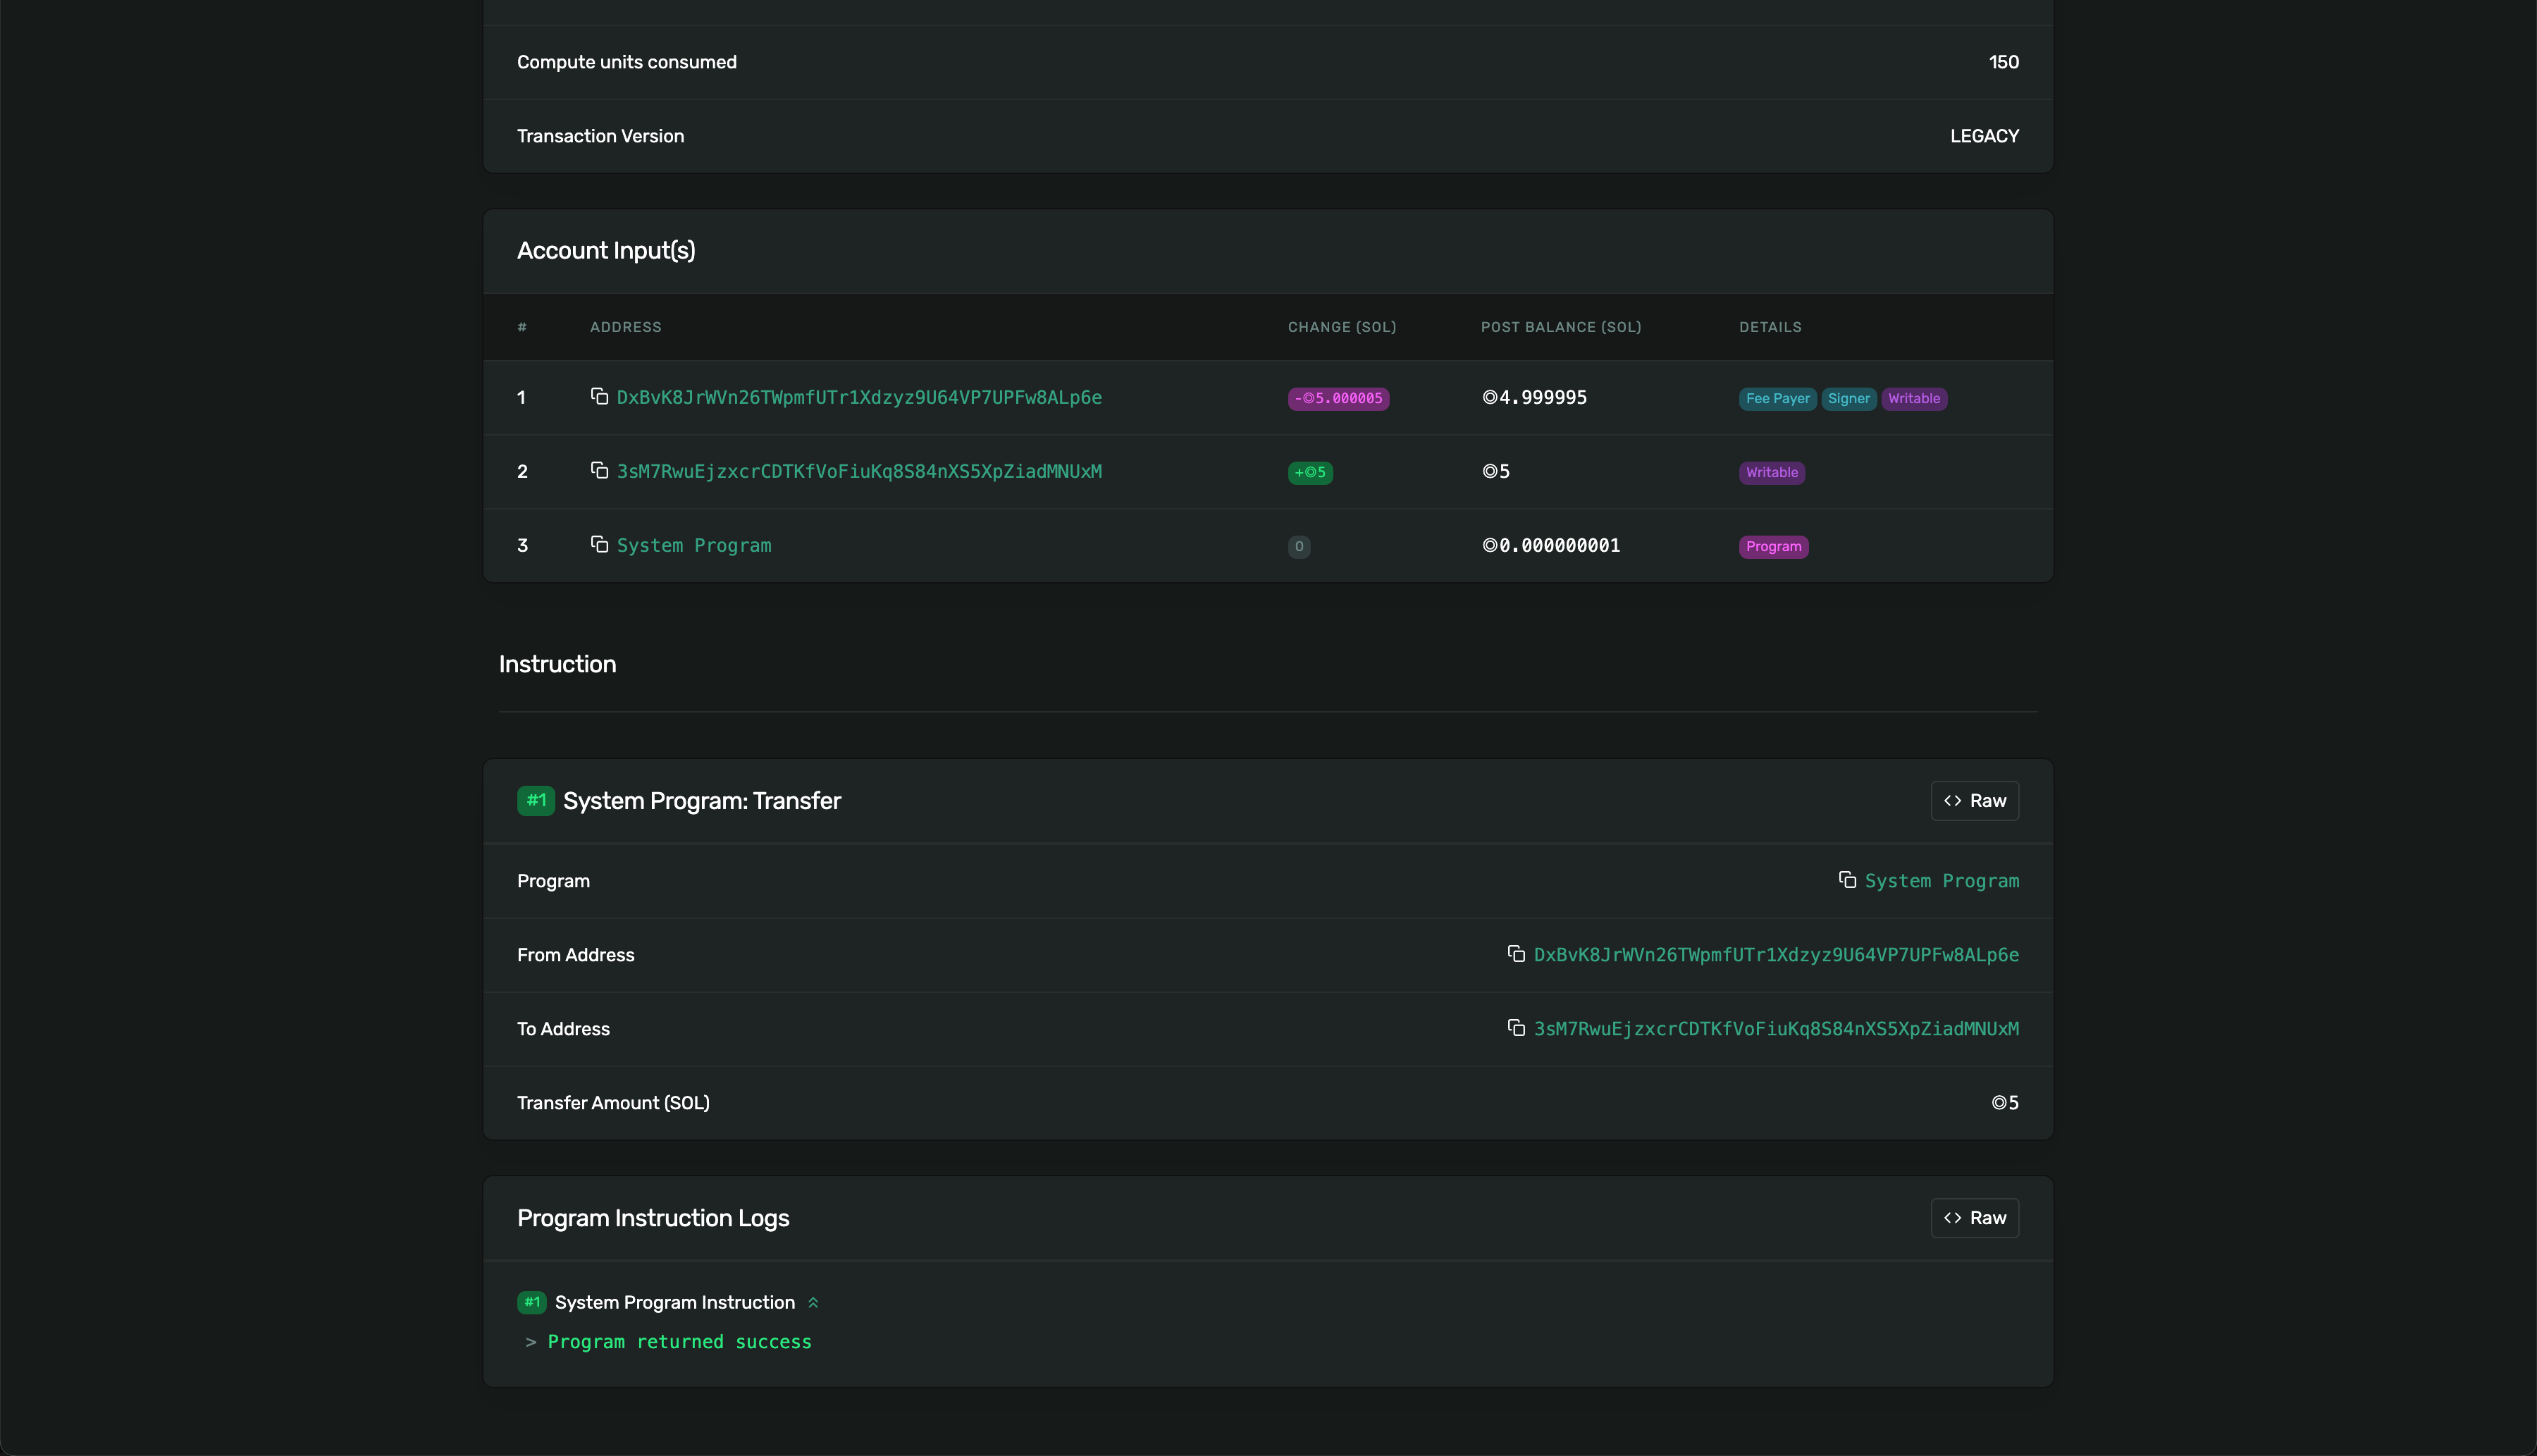
需求二:B 钱包给 A 钱包打币
1 | ❯ solana address |
这里交易信息可以在开发网上看到
Solana Concept
账户模型
结构体
1 | pub struct Account { |
这里有好多好多东西,自己看官网吧
Solana RPC
这里关于 RPC 的详细介绍就不多说了,长话短说,在 Solana 中,RPC(Remote Procedure Call) 是与 Solana 区块链进行交互的核心方式,RPC 接口允许开发者通过调用预定义的 API 来获取区块链上的数据、提交交易或执行其他操作,Solana 的 RPC API 提供了高效的接口,能够支持快速读取链上数据及执行交易
这一部分在最开始的介绍有些到这里给出几条通过 CURL 调用的命令
- getAccountInfo,查询账户信息,包括账户余额、持有的代币等
1 | ❯ curl -X POST https://api.devnet.solana.com \ |
- getBalance,获取指定账户的 SOL 余额
1 | curl -X POST https://api.devnet.solana.com \ |
详见
Solana Hello World
这里直接以官方 Hello World 项目为例子
比较基础的环境搭建这里就不说明了,把 URL 先设置成 localhost 集群,然后启动一下
1 | solana config set --url localhost |
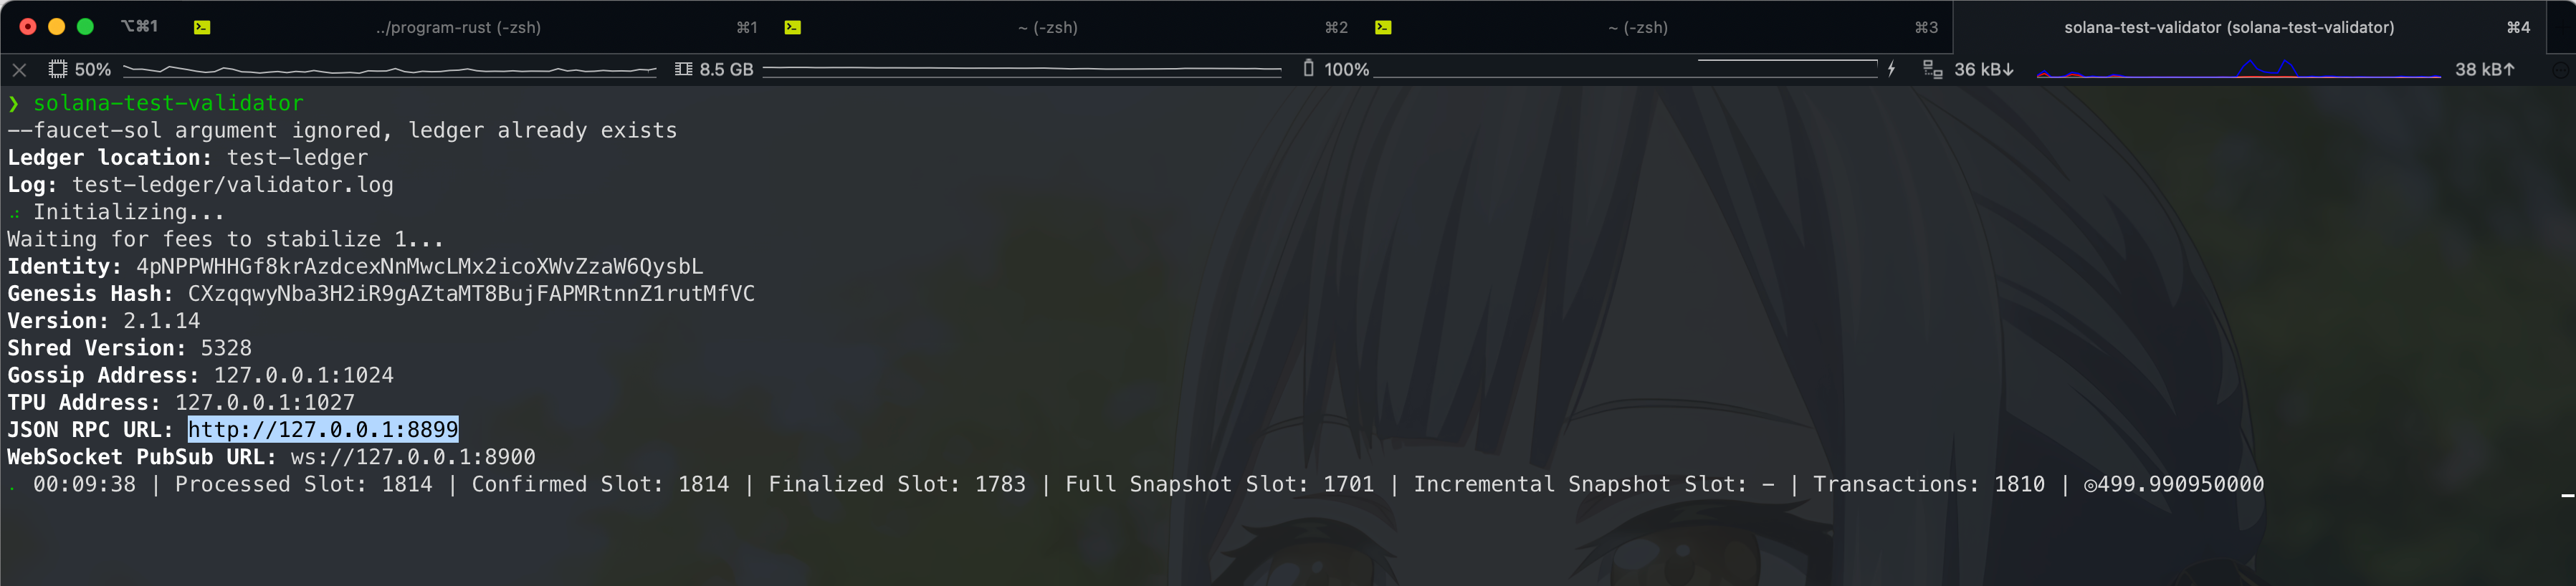
这里可以发包测试一下
1 | curl -X POST http://127.0.0.1:8899 \ |
这里引入 Web3.js 这个是啥具体就不多说了 npm install --save @solana/web3.js@1
构建项目
1 | npm run build:program-rust |
启动客户端
1 | npm run start |
代码解析,lib.rs 用于验证账户被调用的次数
1 | // lib.rs |
如您对上述步骤感到繁琐,可以到 Solana 的 Playground 进行线上编译 https://beta.solpg.io/,从上面程序来看,可以总结一下 Solana 程序的一个大致逻辑,我们首先用到了 solana_program 这个标准库,并且将下面这传代码纳入了作用域
1 | use solana_program::{ |
AccountInfo:account_info 模块中的一个结构体,允许我们访问帐户信息。
entrypoint:声明程序入口点的宏,类似于 Rust 中的 main 函数。
ProgramResult:entrypoint 模块中的返回值类型。
Pubkey:pubkey 模块中的一个结构体,允许我们将地址作为公钥访问。
msg:一个允许我们将消息打印到程序日志的宏,类似于 Rust 中的 println宏。
Solana 使用的入口点为 entrypoint! 声明的宏,相对应的我们可以这样声明一个入口点
1 | entrypoint!(process_instruction_one); |
正常来说我们写一个累加程序都需要定义一个变量用于存储我们的 cnt,Solana 定义了一个 Account 数据账户来存储数据,这一点可以看看开发文档里的(链接在上面)
1 | /// 定义数据账户的结构 |
之后通过 \#[derive(BorshSerialize, BorshDeserialize, Debug)] 这两个派生宏实现
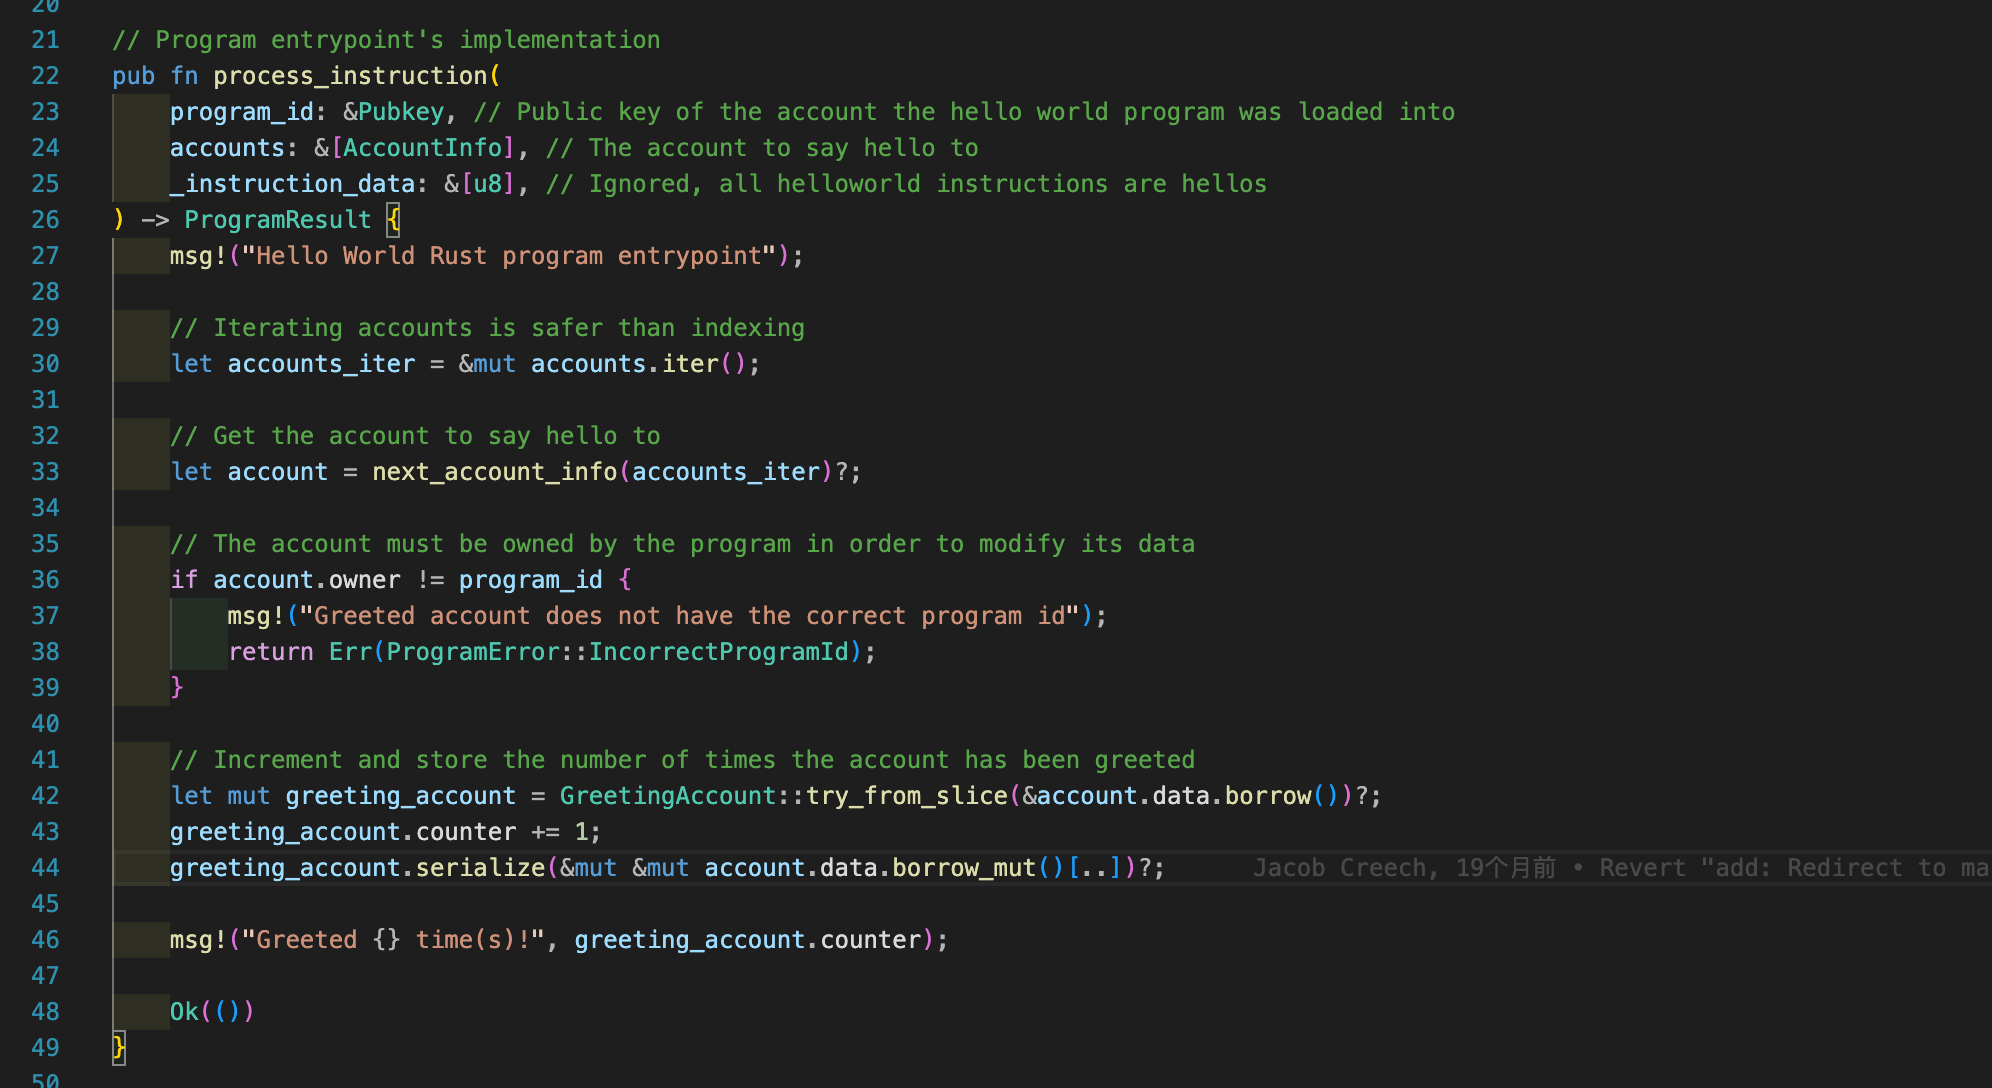
这里 CounterAccount 结构体对应的为数据账户,只能由 Owner 所有者更改,总的来说
先创建一个 AccountInfo 迭代器,用于遍历 accounts 数组。
1 | let accounts_iter = &mut accounts.iter(); |
然后从迭代器中获取下一个账户信息,即存储计数器的数据账户
1 | let account = next_account_info(accounts_iter)?; |
接着加载数据账户数据
1 | let mut counter_account = CounterAccount::try_from_slice(&account.data.borrow())?; |
从数据账户的 data 字段中反序列化出 CounterAccount 结构体。try_from_slice 方法会将字节数组转换为 CounterAccount 结构体,然后 +=1 接着写会账户
1 | counter_account.serialize(&mut &mut account.data.borrow_mut()[..])?; |
剩下的例子可以看官方文档,我就不重复了
Anchor
Anchor 是 Solana Sealevel 运行时的一个框架,为编写智能合约提供了几个方便的开发工具。
Rust eDSL 用于编写 Solana 程序
IDL 规范
用于从 IDL 生成客户端的 TypeScript 包
用于开发完整应用程序的 CLI 和工作区管理
机翻自 Github https://github.com/coral-xyz/anchor,官方文档:https://www.anchor-lang.com/docs/installation
安装
1 | cargo install --git https://github.com/coral-xyz/anchor avm --force |
创建项目 https://www.anchor-lang.com/docs/references/cli#init
1 | anchor init anchor_solana_test |
构建智能合约,会生成一个二进制文件在 target/deploy
1 | anchor build [anchor_solana_test] |
测试程序
1 | anchor test |
部署程序
1 | anchor deploy --env devnet # 部署到测试网加个 --env 就行了 |
这里 Anchor 同样有一大堆宏,可以看看文档,补一个项目结构(基于 Playground)
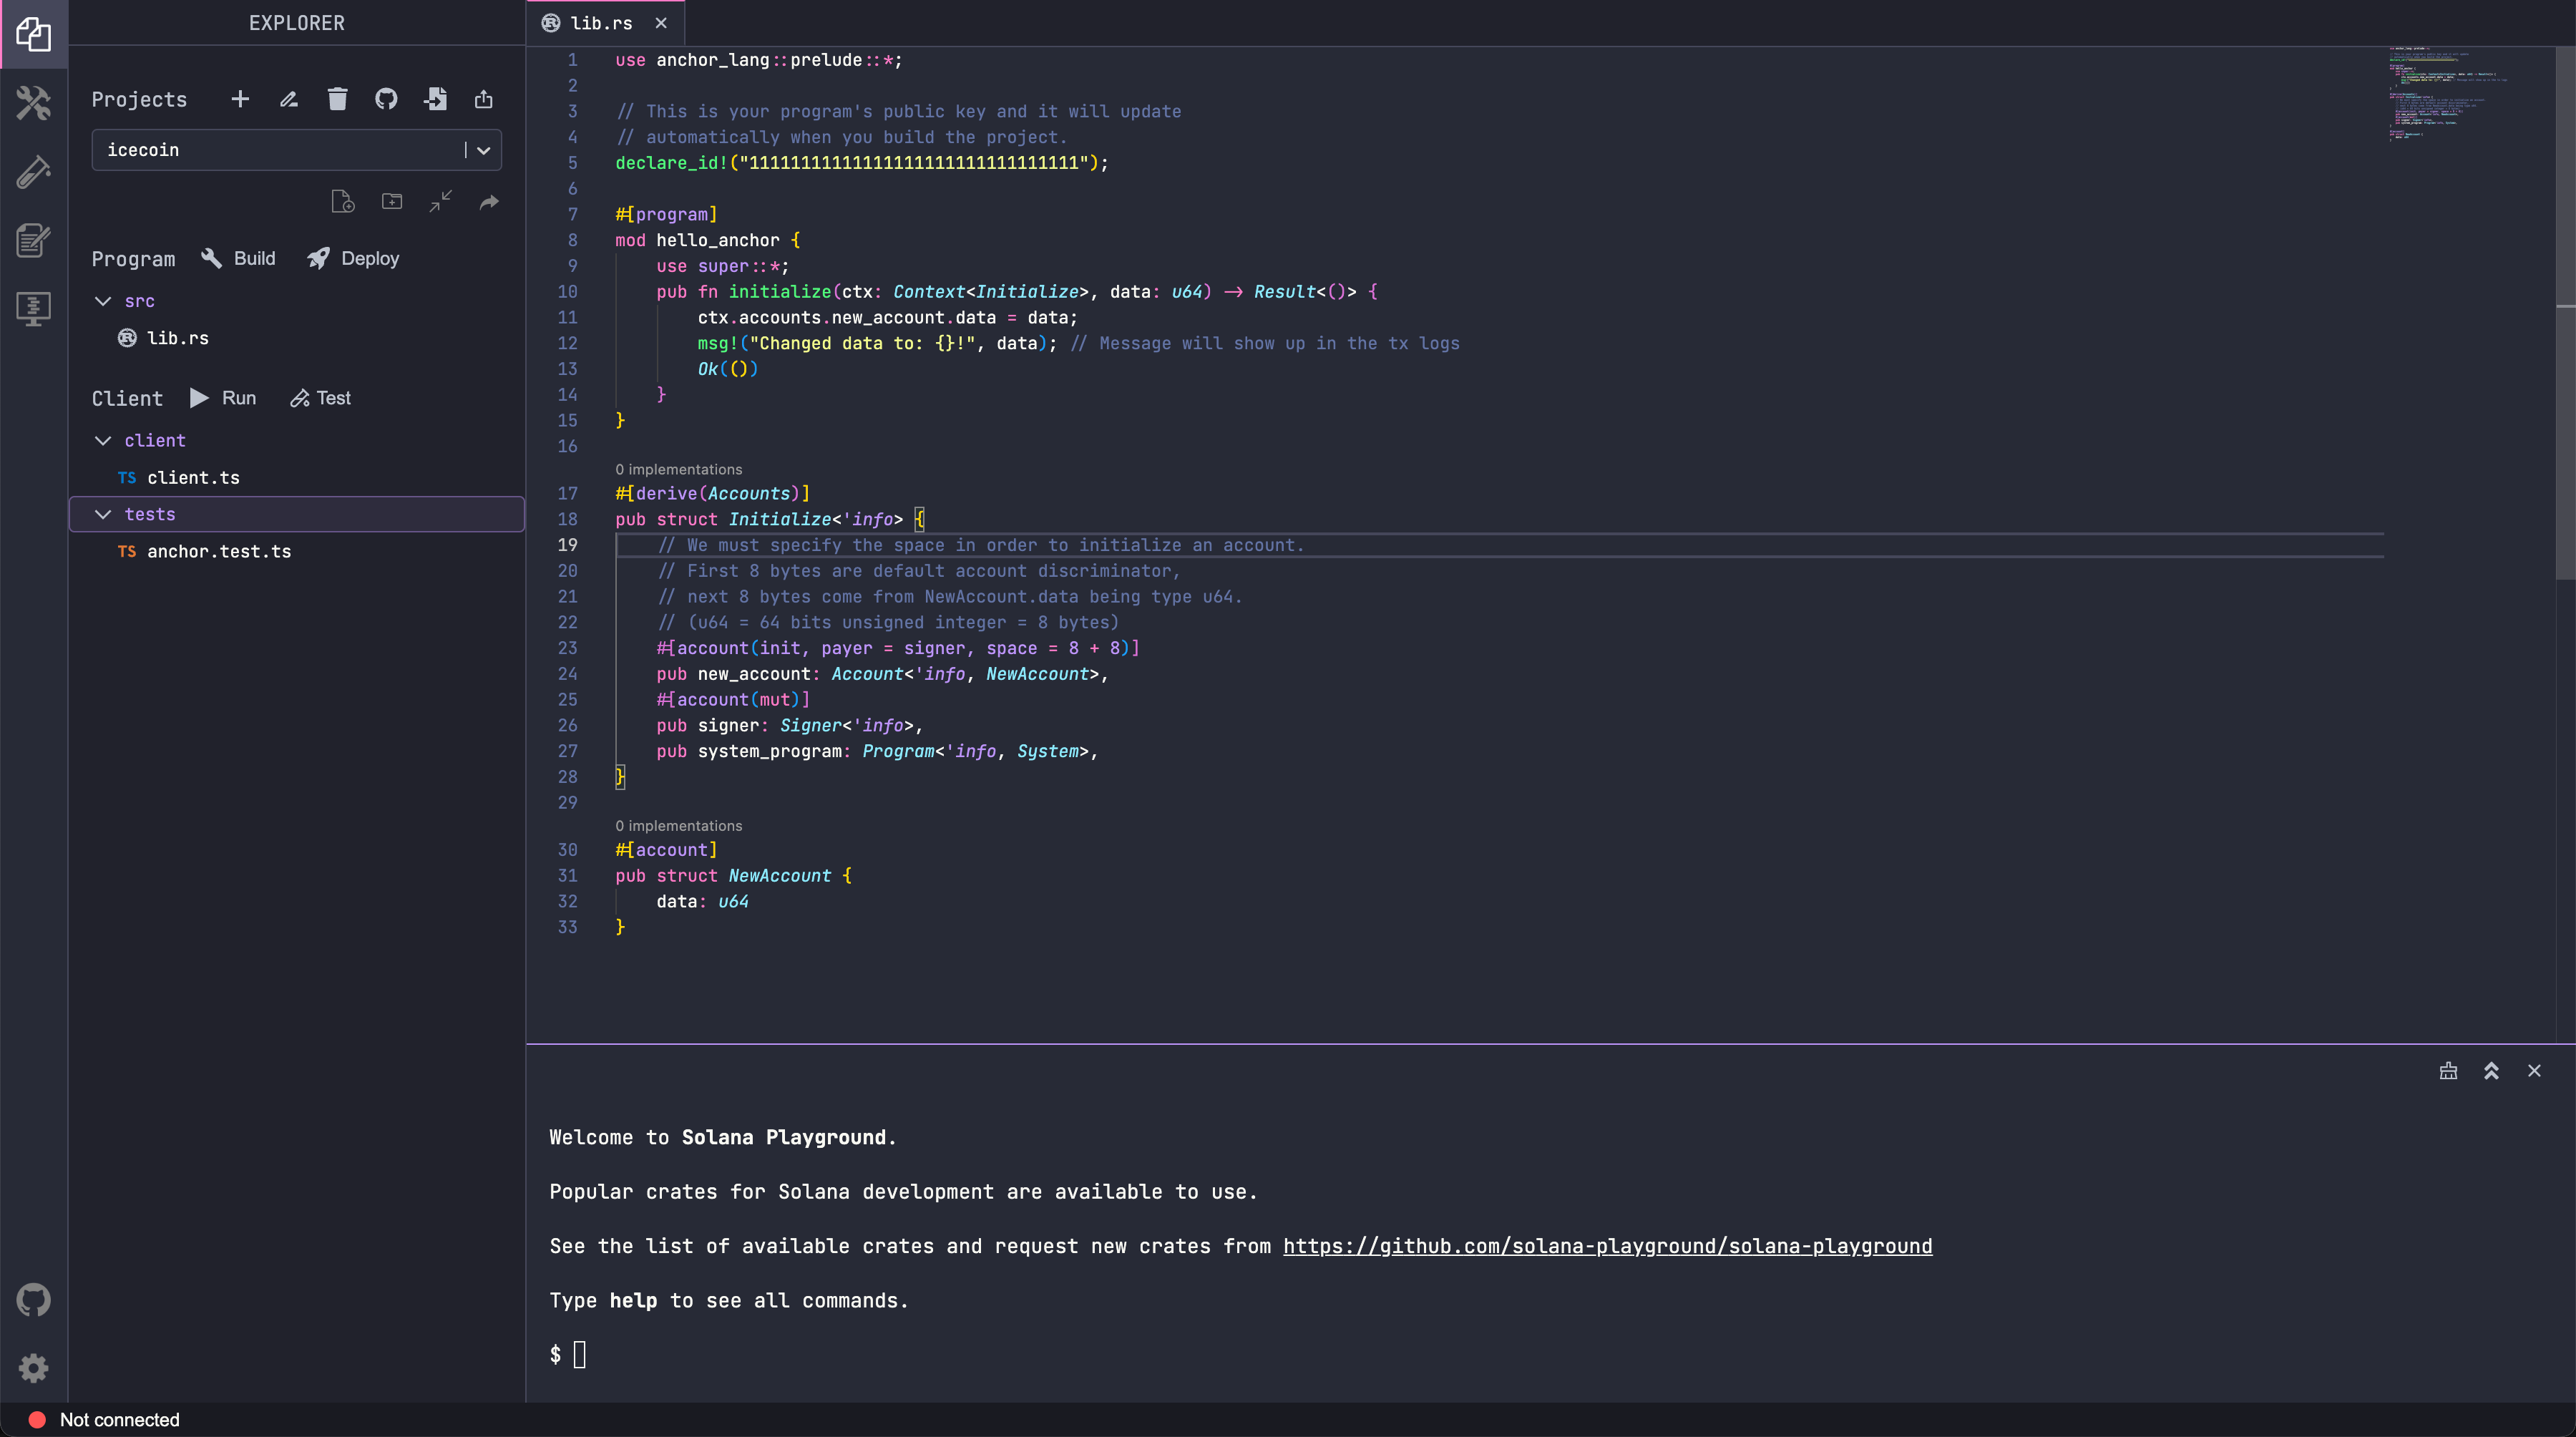
还得是 DevOps 方便啊
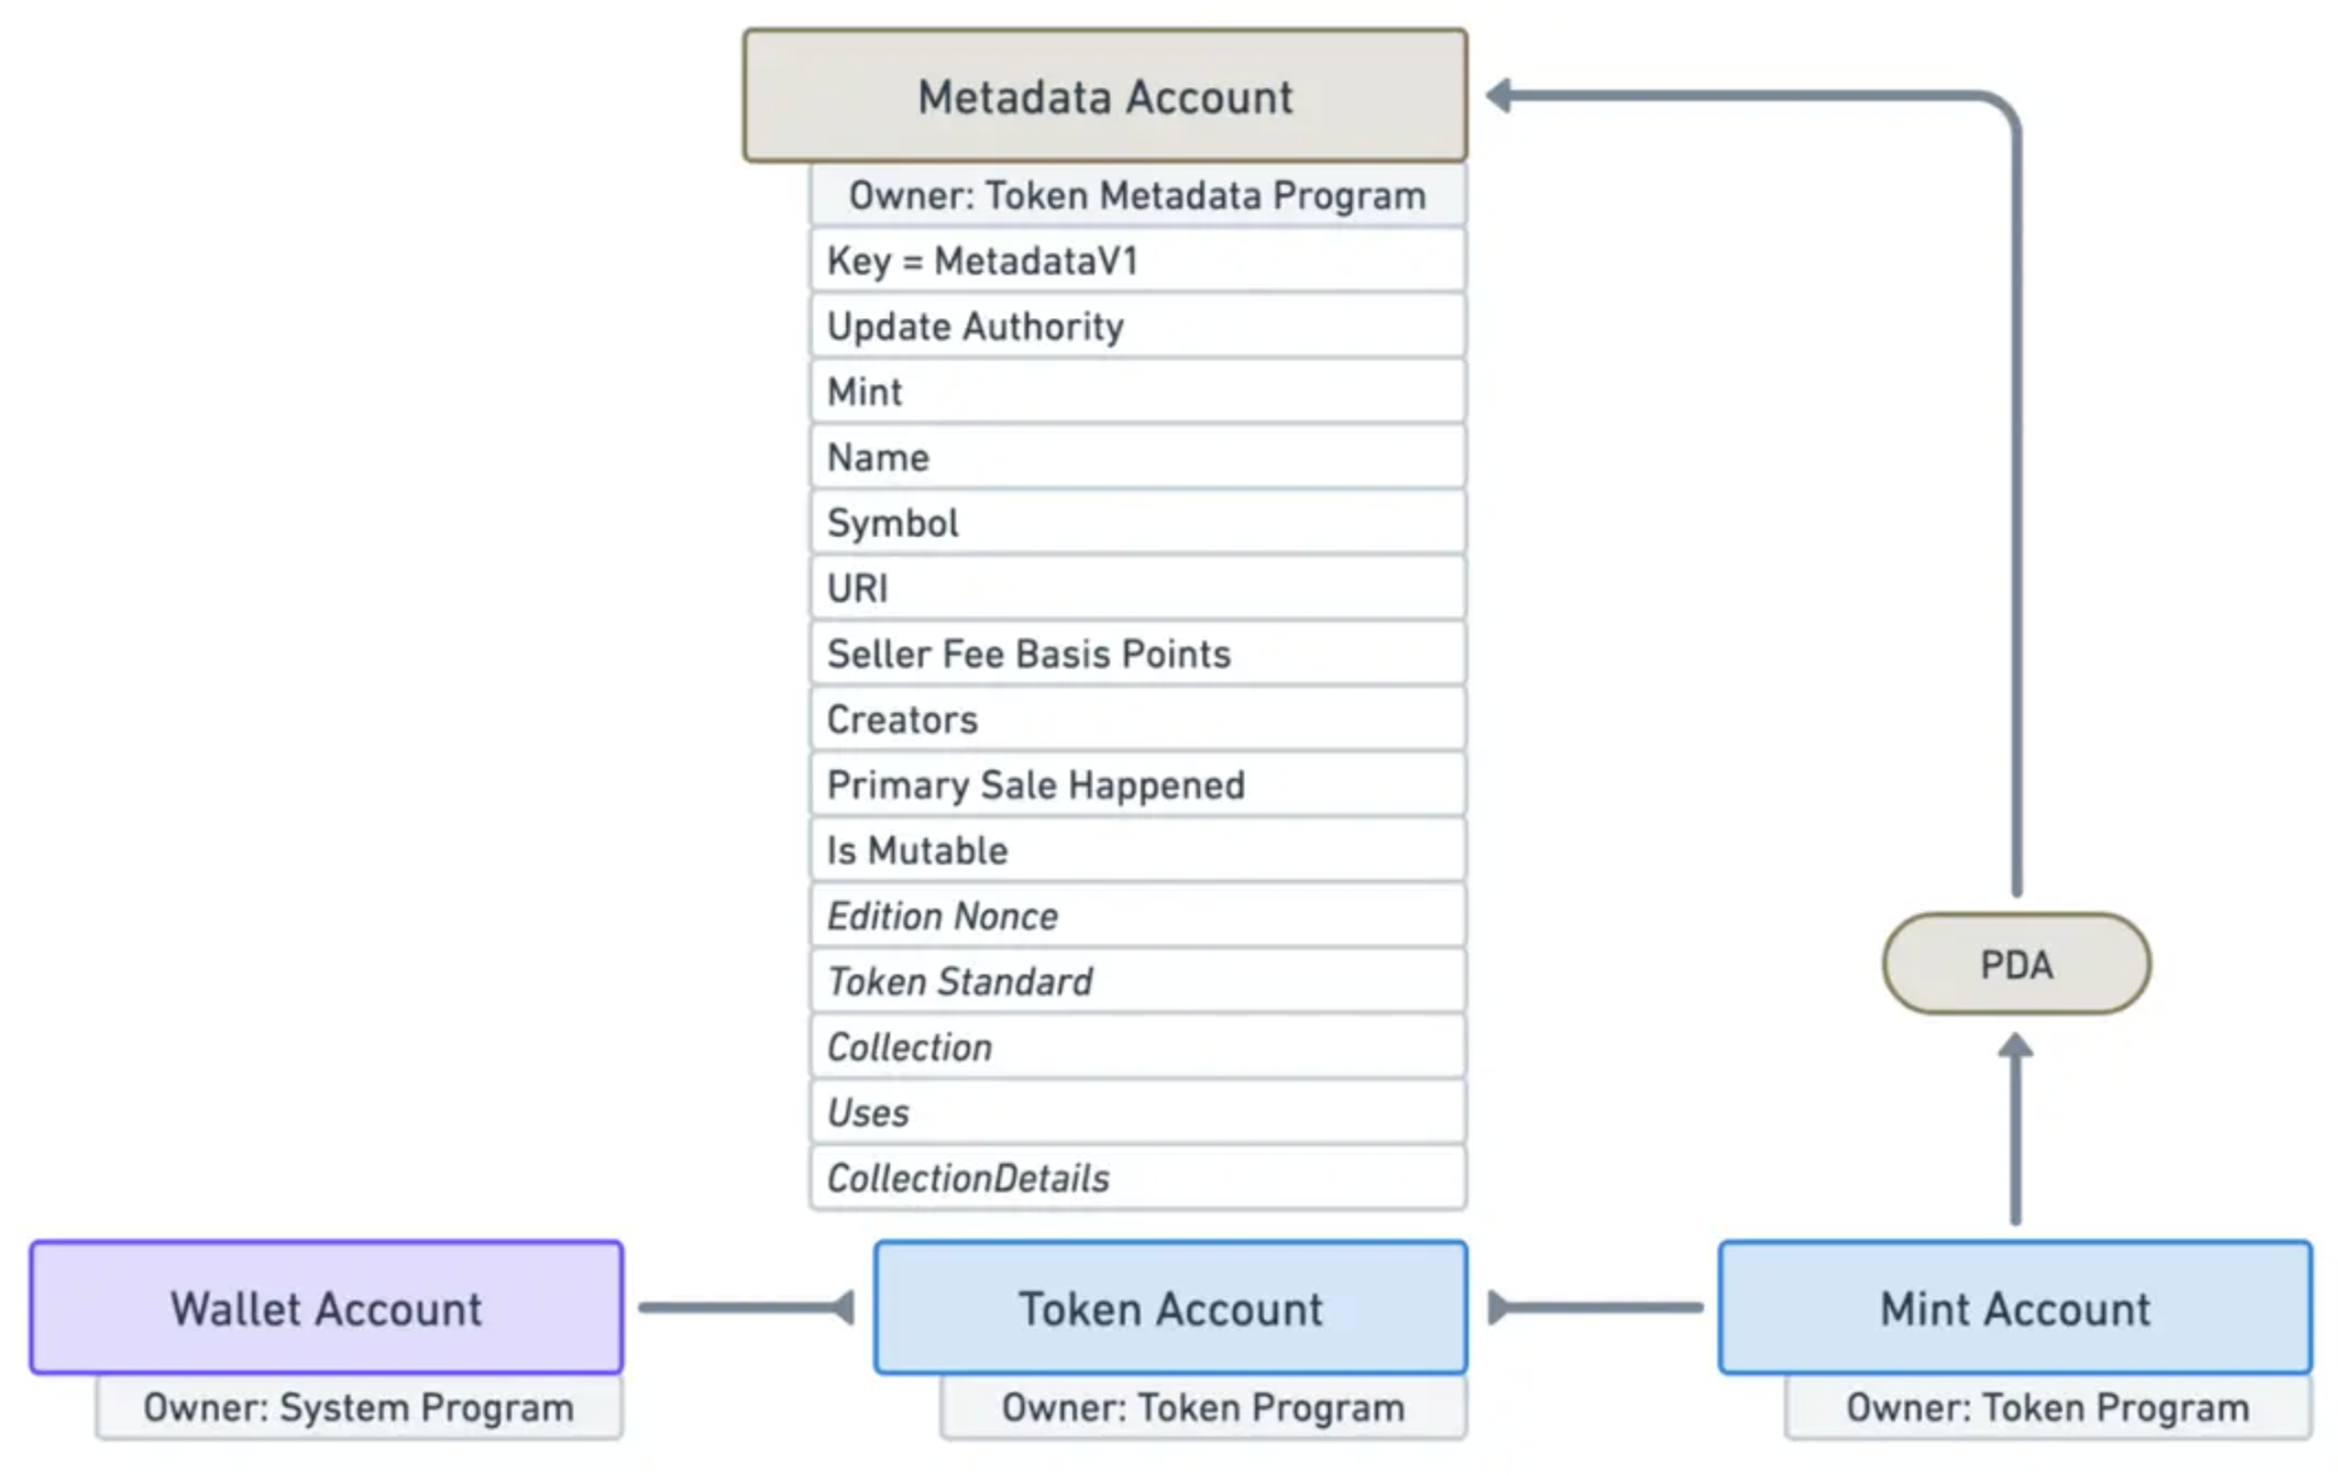
Solana NFT
- 有单独的数量,超过了就铸造不了了
使用 Anchor 脚手架进行配置
1 | use anchor_spl::{ |
铸造 mint_to(cpi_context, 1)?;,补一张图
Release
切换网络
1 | solana config set --url devnet |
构建项目
1 | anchor init icecliffs_nft |
导入依赖
1 | [package] |
源代码
1 | /// lib.rs |
部署程序
1 | anchor build && anchor deploy |
交互环节
1 | import * as anchor from "@coral-xyz/anchor"; |
铸造 NFT
1 | anchor test |
查看 NFT
1 | minted nft |
差不多就这样吧,未完待续。
Reference
Solana 开发笔记